A grab bar installed in the wrong spot provides false security. Here’s exactly where to put them — shower, tub, toilet, and beyond — for real protection.
Installing grab bars is one of the most impactful things you can do for a senior’s bathroom safety. But here’s what most guides don’t tell you: a grab bar installed in the wrong spot is almost as bad as not installing one at all.
Placement determines whether the bar is actually there when your parent reaches for it during the highest-risk moments — stepping into the shower, rising from the toilet, moving on a wet floor. Get the placement right and you’ve addressed the real risk. Get it wrong and you’ve spent money on a bar that looks reassuring but doesn’t help when it counts.
This guide covers exact placement for every location in a senior’s bathroom — with measurements, heights, and the reasoning behind each recommendation so you understand not just where to put them but why.
If you haven’t chosen your grab bars yet, our review of the best grab bars for seniors covers exactly what to buy. The 2-pack stainless steel grab bars we recommend there cover the two most critical installation points in one purchase.
→ Get the grab bars on Amazon — have them ready before you plan your installation
Why Placement Matters as Much as Installation
Most families think about grab bars in terms of installation — are they secured in the wall properly? That matters enormously. But placement — where on the wall, at what height, oriented in which direction — determines whether the bar actually intercepts the fall risk it’s meant to address.
A bar mounted too high requires your parent to reach upward during a stumble — an unnatural and mechanically weak position. Too low and they have to bend awkwardly to use it. On the wrong wall entirely and it’s simply not there during the specific transition that creates the fall risk.
The goal of grab bar placement is to put solid support exactly where a hand would naturally reach during the highest-risk moments. That requires thinking through each transition specifically rather than mounting bars wherever there happens to be a convenient stud.

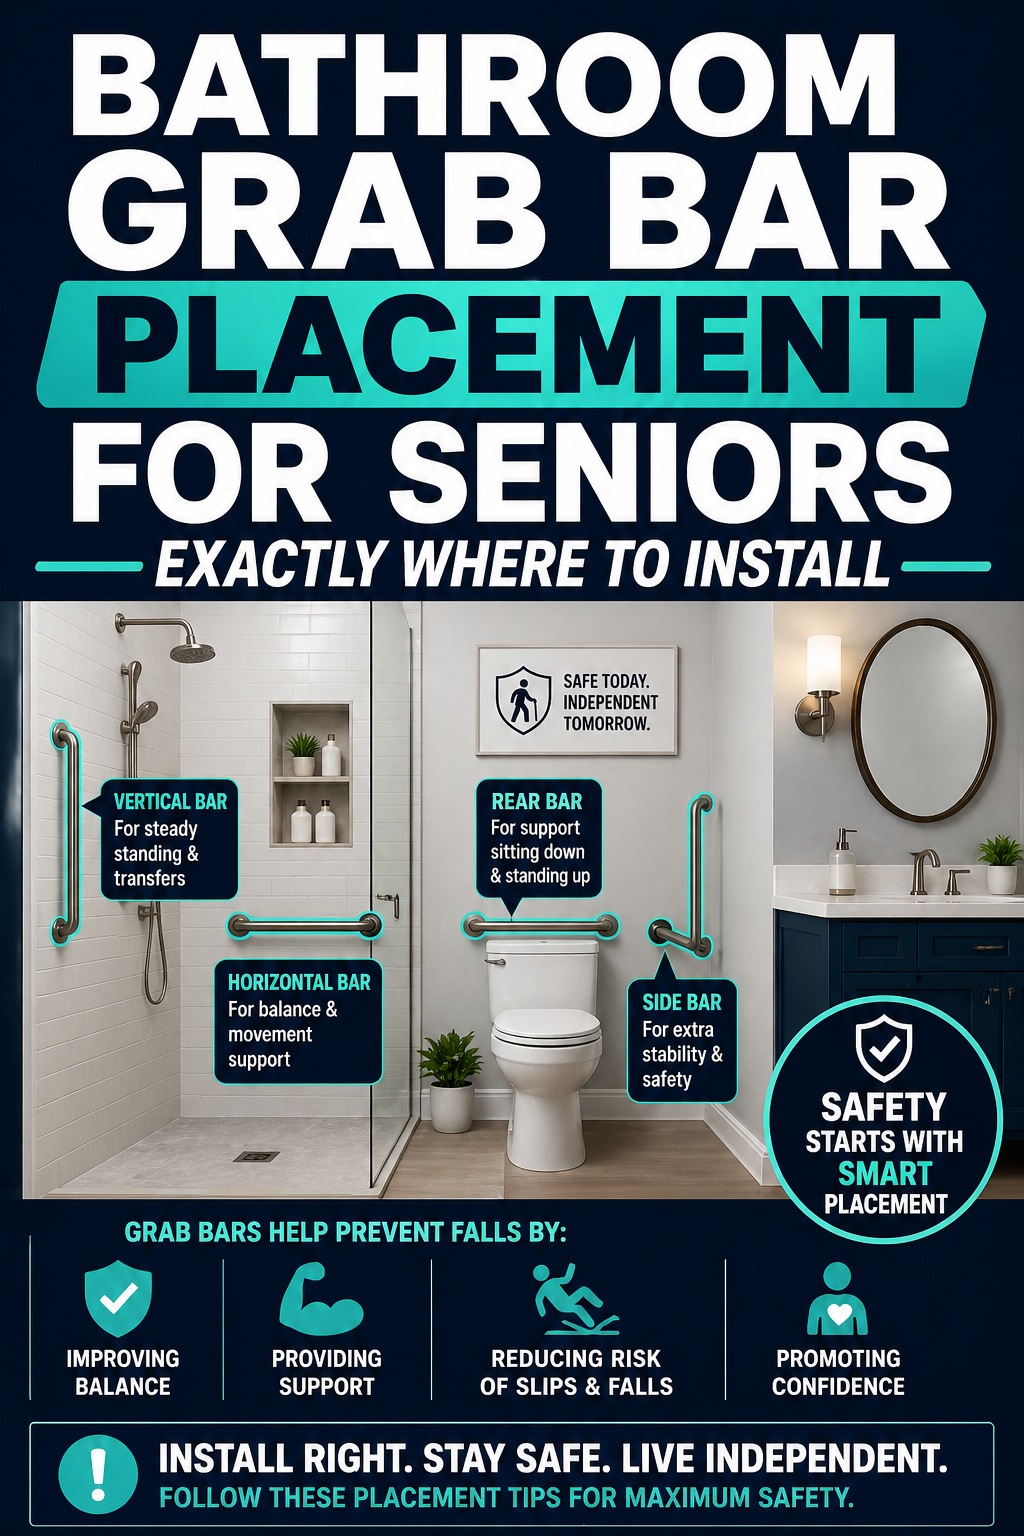
Understanding Bar Orientation — Vertical, Horizontal, and Angled
Before getting into specific locations, understanding what different bar orientations are good for makes the placement decisions much clearer.
Vertical Bars
Vertical bars are gripped at different heights depending on where a person is in a movement. They’re ideal for entry and exit transitions — stepping into a shower, for example — where the hand position changes through the arc of the movement. A vertical bar lets your parent grip high while upright and lower as they bend or step through.
Horizontal Bars
Horizontal bars provide support at a consistent height — good for maintaining balance while standing, for support along a wall, or for pushing up from a seated position. They’re the standard choice for the back wall of a shower and next to the toilet.
Angled Bars
Angled bars — typically at 30 to 45 degrees — combine the benefits of both. They work well at tub entries where the transition involves stepping over a threshold and lowering into or rising from the tub. The angle allows a natural hand position through a wider range of movement than a purely vertical or horizontal bar.


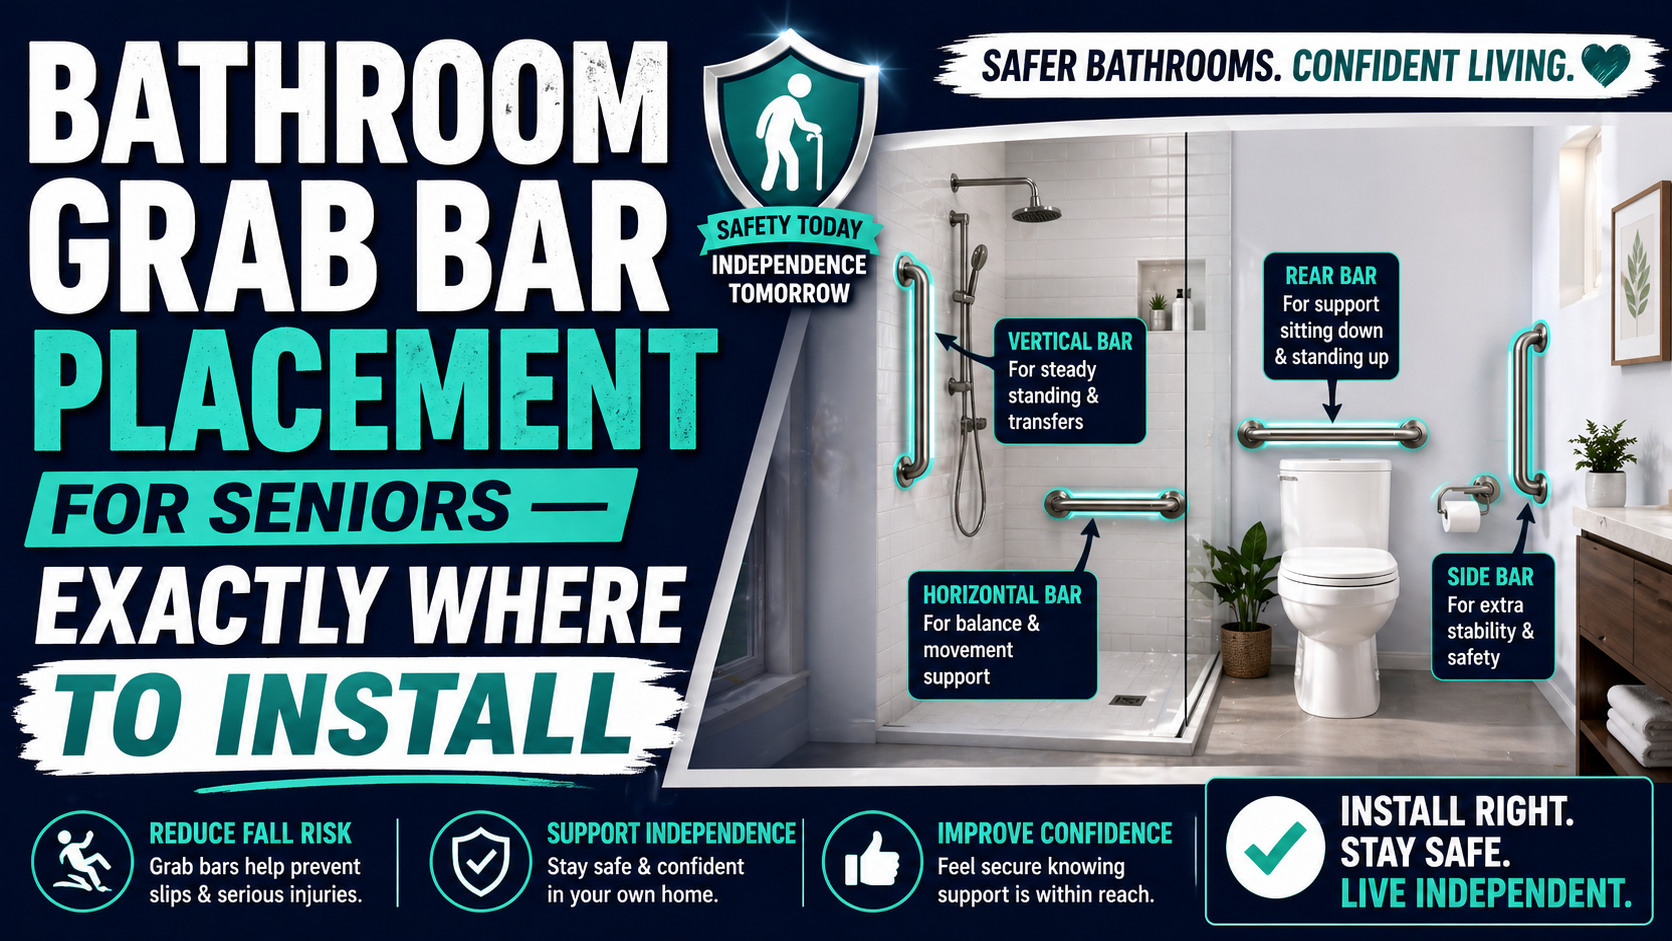
Grab Bar Placement at the Shower Entry
The shower entry is the single most important grab bar location in the bathroom. Stepping into a shower requires transferring all body weight onto one leg while lifting the other — a significant balance challenge responsible for a large proportion of bathroom falls in older adults.
Recommended Placement
Location: On the wall at the shower entry, on the same side as the door or opening, inside the shower space.
Orientation: Vertical or angled at approximately 45 degrees.
Height: Position the bar so it spans from approximately waist height to shoulder height — roughly 33 to 48 inches from the floor. This range allows your parent to grip at a comfortable height while upright and maintain contact through the full stepping motion.
Why this works: A vertical or angled bar at the entry gives your parent something solid to hold during the entire step-in sequence — reaching for it while standing outside, holding through the weight transfer, and releasing once stable inside. This is the moment most shower falls happen and the moment the bar most needs to be there.
→ Order the grab bars on Amazon — shower entry installation is the single highest priority
Grab Bar Placement Inside the Shower — Back Wall
Once inside the shower your parent needs support while standing and bathing. Reaching down to wash feet, turning to rinse, bending to reach lower — all of these movements shift the center of gravity and create instability on a wet surface.
Recommended Placement
Location: On the back wall of the shower, centered on where your parent typically stands.
Orientation: Horizontal.
Height: 33 to 36 inches from the shower floor — approximately hip to waist height. This allows your parent to reach the bar naturally from a standing position without raising their arm significantly.
Length: As long as the wall space allows. A longer bar provides a wider range of grip positions and more coverage during movement. If the shower is narrow, a 16-inch bar centered on the standing position is the practical minimum.
Why this works: A horizontal bar at hip height gives your parent a natural grab point during any moment of instability inside the shower. It’s there at arm’s length in the direction a hand would naturally reach when balance is compromised.
If your parent uses a shower chair — which we strongly recommend for seniors with any balance concerns — the back wall bar also helps with the sit-to-stand transition from the chair. Our review of the best shower chair and bath mat for seniors covers exactly what to look for in both products.

Grab Bar Placement at the Bathtub
Bathtub entry and exit is among the most physically demanding transitions in a senior’s daily routine — stepping over a high threshold, lowering into the tub, and rising from a low position with limited leverage. Each of these movements requires multiple bar locations to address properly.
At the Tub Entry
Location: On the wall at the end of the tub, at the entry point.
Orientation: Vertical or angled at 45 degrees.
Height: Spanning from approximately 28 to 48 inches from the floor — a wide range that covers the full arc of stepping over the tub threshold from a standing position.
On the Long Wall — For Lowering and Rising
Location: On the long wall beside the tub, toward the faucet end where your parent’s upper body will be when seated.
Orientation: Horizontal or angled.
Height: 6 to 8 inches above the tub rim — approximately 24 to 28 inches from the floor depending on tub height. This allows your parent to grip the bar while seated and use it to push up when rising.
Why two bars for the tub: Entry and rising from the bottom of the tub are two distinct movements with different demands. One bar cannot address both optimally. Families who install only one bar at the tub typically install it at the entry — leaving the rising movement unassisted, often the harder of the two.
Grab Bar Placement Next to the Toilet
The toilet is used multiple times every day and the sit-to-stand transition is a repeated fall risk that many families underestimate because it’s so routine. For seniors with hip or knee issues, reduced leg strength, or balance challenges, this transition is genuinely difficult and getting more so over time.
Recommended Placement
Location: On the wall beside the toilet — ideally on the dominant hand side, or whichever side has wall access.
Orientation: Horizontal.
Height: 6 to 8 inches above the toilet seat height — approximately 33 inches from the floor for a standard toilet. This positions the bar at a height your parent can push down on when rising, which is the most mechanically effective use of a toilet grab bar.
Length: Long enough to reach from in front of the toilet to behind it — 24 inches is a good target. This gives your parent grip access throughout the full lowering and rising motion, not just at one point in the sequence.
If wall access is limited: Floor-mounted toilet safety frames with armrests on both sides are an alternative that doesn’t require wall installation. They provide bilateral support and work well when the toilet is positioned away from a wall. They are less elegant but highly effective.
→ Get the grab bars on Amazon — toilet placement is just as critical as the shower
Additional Bar Locations Worth Considering
Beyond the shower entry, back wall, and toilet — the three minimum locations — additional bars can meaningfully improve safety for seniors with significant balance challenges.
Along the Bathroom Wall Between Door and Shower
For seniors who need support navigating the entire bathroom — not just at specific fixtures — a horizontal bar along the longest wall between the door and shower gives them something to hold throughout the full path. This is particularly valuable for seniors with Parkinson’s, significant arthritis, or those recovering from a fall or surgery.
Height: 33 to 36 inches from the floor — consistent with the other horizontal bars so there’s no adjustment in grip height as your parent moves through the room.
Near the Bathroom Entry
A short bar near the bathroom door — on the wall just inside the entry — gives your parent something to grab the moment they enter, before they reach the shower or toilet. For seniors who feel unsteady first thing in the morning or during nighttime bathroom trips, this initial grab point can be genuinely valuable.


ADA Guidelines as a Starting Point
The Americans with Disabilities Act publishes specific grab bar placement guidelines for commercial accessible bathrooms. These are a useful reference point for home installations — not mandatory for private residences, but developed based on ergonomic research into what actually works for people with mobility challenges.
Key ADA reference points for home use:
- Toilet side wall bar: 42 inches long minimum, mounted 33 to 36 inches from the floor
- Toilet rear wall bar: 36 inches long minimum, centered on the toilet
- Shower bar: 36 inches long minimum on the back wall, 33 to 36 inches from the floor
For home installations these measurements are starting points rather than strict requirements. Your parent’s specific height, reach, and mobility should refine the placement from these baselines. If possible have your parent present during planning so you can verify heights work for their specific body before drilling.
The Installation Non-Negotiables
Placement decisions are wasted if the installation isn’t done correctly. A perfectly positioned bar that pulls out of the wall under load is worse than no bar — it creates false confidence and then fails at exactly the moment it’s needed.
Mount Into Studs Wherever Possible
Wall studs — the wooden framing behind drywall or tile — are the strongest anchor point available. Use a stud finder before marking any holes. Standard stud spacing of 16 inches aligns well with 16-inch grab bars, which is one reason that length is so common and practical.
Use Load-Rated Anchors When Studs Aren’t Available
When the ideal placement location doesn’t land on a stud, use toggle bolts or specialized wall anchors specifically rated for grab bar installation loads. Standard drywall anchors are not sufficient. The anchor rating needs to match the bar’s load rating — not just hold the bar in place under static weight but resist the dynamic forces of a stumble or fall.
Tiled Walls Require a Tile Bit
Drilling through ceramic or porcelain tile without cracking requires a diamond-tipped tile bit and low drill speed. Mark locations precisely before starting. Use masking tape over the drill point to reduce the chance of the bit walking across the surface before it bites in.
When to Hire a Professional
If any part of the installation process feels beyond your comfort level — finding studs in a tiled wall, drilling through tile, selecting appropriate anchors — hire a handyman. Grab bar installation typically takes under an hour and costs $50 to $150 in labor. Given that the bar’s entire value depends on staying in the wall when it’s needed, professional installation is money very well spent.


The Grab Bar and Full Bathroom Safety Picture
Grab bars at the right locations address the highest-risk transitions in the bathroom — but they work best as part of a complete bathroom safety approach.
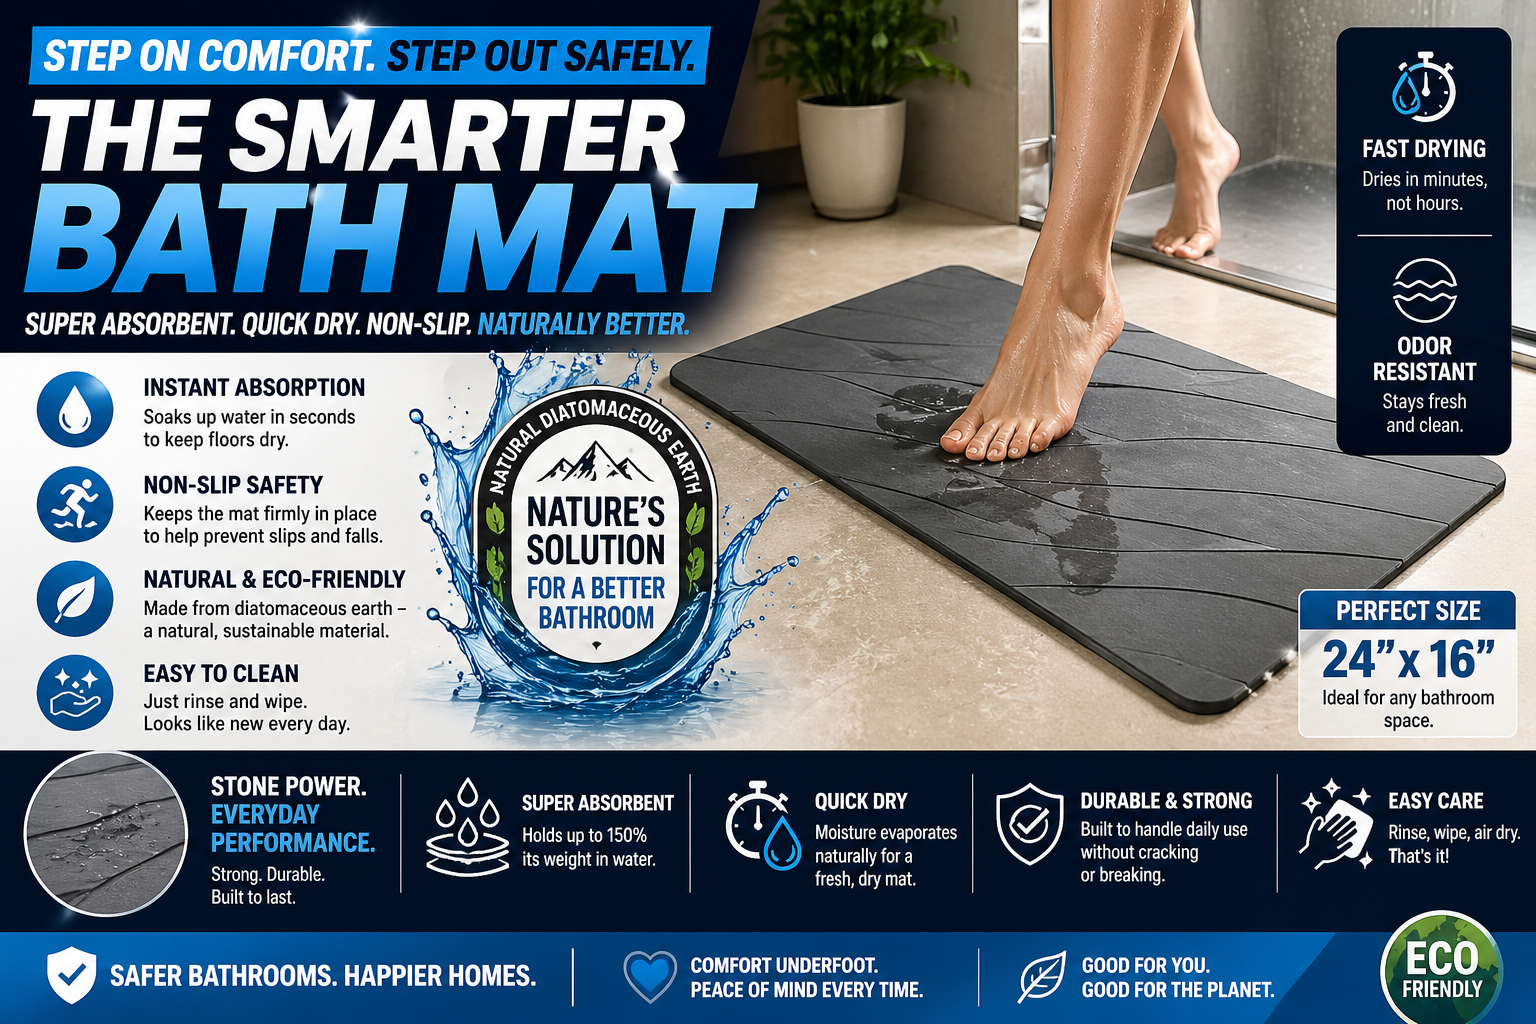
Pair properly placed grab bars with a quality shower chair to eliminate standing risk inside the shower, and a non-slip bath mat that stays in place when your parent steps out. Our full guide on how to make a bathroom safer for seniors covers every upgrade worth making across the entire room.
And even with every bathroom safety measure in place, falls can still happen — in the bathroom and elsewhere. The SecuLife Smartwatch detects falls automatically and alerts family members without your parent needing to press a button. It’s worn on the wrist so it goes into the bathroom — unlike a base unit sitting in the living room that can’t hear through a closed door. Our full SecuLife Smartwatch review covers everything you need to know before deciding.
For fall prevention beyond the bathroom our comprehensive guide on fall prevention tips for elderly at home walks through every room with a complete checklist. And if you’re weighing the cost of adding a medical alert device to the safety plan, our breakdown of how much a medical alert system costs makes the numbers clear.

Grab Bar Placement Checklist
Use this as your installation planning reference. Check off each location as bars are installed.
- ☐ Shower entry — vertical or 45-degree bar, 33 to 48 inches from floor
- ☐ Shower back wall — horizontal bar, 33 to 36 inches from floor
- ☐ Tub entry — vertical or angled bar, 28 to 48 inches from floor
- ☐ Tub long wall — horizontal bar, 6 to 8 inches above tub rim
- ☐ Toilet side wall — horizontal bar, 33 inches from floor, 24 inches long
- ☐ Bathroom entry wall — short bar at 33 to 36 inches if needed
- ☐ Along main bathroom wall if senior needs full-path support
- ☐ All bars mounted into studs or load-rated anchors
- ☐ Heights verified with parent present before final installation


Frequently Asked Questions About Grab Bar Placement
Does it matter which side of the toilet the grab bar goes on?
Ideally install on the dominant hand side — the hand your parent naturally reaches with will find the bar more instinctively under stress. If wall access only exists on one side, install there and make sure your parent practices reaching for it so it becomes automatic. If possible install bars on both sides for maximum support during both lowering and rising.
Can grab bars be installed on the inside of a shower on a tile wall?
Yes — tiled walls can accept grab bars with proper installation technique. Use a diamond tile bit to drill through the tile without cracking, then use appropriate anchors or find the studs behind the tile. The installation is slightly more involved than drywall but entirely manageable with the right tools or a professional.
How high should grab bars be for a very tall or very short senior?
The measurements in this guide are based on average adult height. For seniors significantly taller or shorter than average, adjust heights proportionally — the goal is always that the bar is at a height the person can reach comfortably without stretching up or bending down awkwardly. Have your parent stand in position and physically show you where a natural reaching height would be before marking installation points.
Are there grab bars that work without drilling?
Suction cup grab bars exist but are not appropriate for primary safety use. They can release without warning under load and should never be relied upon as a fall prevention measure for a senior. Properly drilled and anchored bars are the only appropriate option for genuine bathroom safety.
Should grab bars be installed before or after other bathroom safety upgrades?
Grab bars first — they have the highest impact and address the most serious fall risks. Install them before spending time or money on any other bathroom safety upgrade. Everything else — shower chairs, bath mats, raised toilet seats — builds on the foundation of having solid grab points at the critical transitions.
Get the Placement Right — It Makes All the Difference
A grab bar in the right location, properly installed, is one of the most effective fall prevention tools available for a senior’s bathroom. A bar in the wrong location — or worse, a towel bar being used as a grab bar — provides false security that can make a fall more dangerous rather than less.
Use the placement guide above, get the bars ordered, and get them installed this week. The bathroom is a daily risk. Every day the bars aren’t in place is a day your parent is navigating those transitions without the support they need.
→ Order the 2-Pack Stainless Steel Grab Bars on Amazon


About the Author
Carol Simmons is a Certified Aging-in-Place Specialist (CAPS) who spent 15 years helping families assess and modify homes for elderly relatives across Florida and the Southeast. She has completed hundreds of home safety assessments and seen firsthand which changes make the biggest real-world difference — and which ones families spend money on without meaningful impact. Carol writes for Elder Safety Guide to help families get practical, prioritized guidance without needing to hire a specialist for every decision.